Using Gparted for VPS Disk Partition : Install slackware in vps using custom iso case

Install slackware in a vps is assignment I create for student. The challenge is rather different than install others (BSD or Linux distro) operating system. Yes, create partition is a must in this work. If Ubuntu or CentOS or OpenSUSE provide easy way to create partition then Slackware is strict.

The minimal solution is still the same. Create swap and native but you must use command line tools like cfdisk or fdisk. One of my student admire if he did different way to accomplish the job. He use Gparted to create the partition followed by Slackware installation.

I think his way might be useful for others who want to achieve the same target : install slackware in vps.  So, here the steps I try to recreate for that aim.

Preparing Gparted & Slackware ISO

I use vps provider that let me use custom iso like Vultr. After login then click ‘My ISO’ to upload the iso.

I use Gparted from Jaist mirror.

For Gparted 0.20.0-2 iso file (x64) click here.

I also use Slackware 14.1 iso from Slackware mirror.

Both of iso use 64 bit version.

Enter location of iso file then upload.

Install slackware in vps using custom iso : choose slackware iso location

More

How to install OpenSUSE 13.1 Server in VPS using custom iso

Today, my class will be discuss on how to install Zimbra Collaboration Suite. One of my student want to try it using different OS. As we don’t have access for Linux Suse Enterrprise Server 11 then we’ll try it on OpenSuse 13.1 . I never try it beside using Ubuntu but it won’t hurt right 🙂 . VPS is ready for such action.

I start by install OpenSUSE 13.1 server using VPS that support custom iso with these details :

  1. Location : Frankfurt
  2. Memory : 1GB (lowest memory available is 768 but I’ll try 1 GB)
  3. HD : 20 GB
  4. Technology : KVM
  5. Price : $7/mo

Lets get start!

More

How to Install DragonFlyBSD in VPS using custom iso feature

Distrowatch told me about newest version of DragonFlyBSD (3.8.0) . This version also in my waiting list as I know this BSD variant since beginning. When DragonFlyBSD begin using ports  aka dports to their software installation management then I’m happily use this version as server.

For documentation process when I delegate installation process for my staff I create this simple guide.

Of course its VPS based as we try to minimize physical server for our company 🙂

Create temporary iso location

DragonFlyBSD provide .iso.bz2 link and I have to convert it to .iso first. The idea is create temporary location for iso file and use it for Vultr custom iso.

I think my lowendspririt vps is good place to hold temporary image.

$ ssh [email protected] -p 17020
[email protected]’s password:
Welcome to Ubuntu 12.04 LTS (GNU/Linux 2.6.32-042stab084.17 i686)

* Documentation:  https://help.ubuntu.com/
Last login: Mon Jun  9 13:23:09 2014 from 36.68.189.115
# cd /var/www/oteos.com/htdocs/
# wget -c http://avalon.dragonflybsd.org/iso-images/dfly-x86_64-3.8.0_REL.iso.bz2
–2014-06-10 10:17:20–  http://avalon.dragonflybsd.org/iso-images/dfly-x86_64-3.8.0_REL.iso.bz2
Resolving avalon.dragonflybsd.org (avalon.dragonflybsd.org)… 2001:470:1:43b:1::72, 199.233.90.72
Connecting to avalon.dragonflybsd.org (avalon.dragonflybsd.org)|2001:470:1:43b:1::72|:80… connected.
HTTP request sent, awaiting response… 200 OK
Length: 208704827 (199M) [application/x-bzip2]
Saving to: `dfly-x86_64-3.8.0_REL.iso.bz2′

More

WordPress Hack – Manual Cleanup

Hacked wordpress is pain but after get it restored you must cleanup manually a few aspects for optimum performance. To make sure you follow Google rules you can use Google webmaster tools to detect the mess.

Check Crawl Errors

Google Bot will tell error they found during scanning process.

Click Errors then check every aspects (desktop, smartphone and feature phone)

crawl_error

Clean Up

Soft 404 mean Google think its not exist but its do exist.

wordpress_tags

As you see from the picture. WordPress tags put ‘un relevant’ content for your blog.

To get rid of this tags :

1. Login to wordpress

2. Click Tags under Post section

3. Check the box and delete un related tags manually.

Mark as Fixed

Some links might respond slow then Google bot think it doesn’t exist. Check it manually by visit the link and click “mask as fixed” when you’re done.

How to install OpenBSD in VPS using custom iso

My friend came up with question about OpenBSD. He ask me about possibility of install OpenBSD remotely and continue to manage it for different purpose. I promise to help but due to time constraint I can not visit his house and teach him. I decide to make this post for him but I hope this simple guide will also help others that might face similar problem.

I use vps service from Vultr for this guide since I can use my existing credit and also quick setup process.

Others series that related to custom iso vps :

Upload OpenBSD iso to VPS server

I use Australia for VPS server location so I use nearest OpenBSD mirror close to Australia (Internode amd64 OpenBSD 5.5). This tutorial use OpenBSD 5.5 but you can change the iso file (I’ll update latest iso list when OpenBSD release new version).

Update on May 12 2015:

OpenBSD 5.7 has released. You can use these iso :

  • 64 bit OpenBSD 5.7 iso, (http://ftp.openbsd.org/pub/OpenBSD/5.7/amd64/install57.iso)
  • 32 bit OpenBSD 5.7 iso, (http://ftp.openbsd.org/pub/OpenBSD/5.7/i386/install57.iso)

If you want to use 5.6 release then you can use this iso :

Enter the link on “remote URL” section.

How to install OpenBSD in VPS using custom iso - choose your openbsd iso location file

More

How to migrate Fresh Store Builder to New Server : Digital Ocean way

In this era competition make everything better. Specially in hosting industry. I used to stick on provider host due to :

  1. Price (cheaper is better)
  2. Stability (good uptime is great)
  3. Fast network (low latency is one of signal I see).
  4. Good support (I love friendly and fast support).

Of course rare communication with support mean the service is great.

In this post I’ll show how to move Fresh Store Builder (FSB) from one host to another host. In this case I’ll move FSB I install on Vultr to Digital Ocean. (At the moment both provider give me good impression specially Digital Ocean that I use more than 1 year but Vultr also good since they backed up by Choopa who provide good online gaming infrastructure).

Lets get start migration process.

Create Droplet on Digital Ocean

I use closest location to UK (Vultr way). This time I choose Amsterdam.

fsb_do1

Ubuntu version also same 12.04 x64. More

Easy VPS for FreshBuilder Store : Vultr Way

I got client who order service for moving his fresh store builder store. He use shared hosting that use cpanel. He don’t want to use cpanel anymore and willing to pay no more than $6/month for his vps server.

I give him two options : using digitalocean or vultr and he choose vultr.

I decide to share experience to hostingformula.net reader on how to build great vps server for freshstore builder user  with minimum hassle 🙂

Create Server on Vultr

Vultr provide vps service start from $5 / month. Fresh Store Builder (FSB) user can use smallest server that Vultr  provide.

1. Login to Vultr and  create an instance

freshbuilder_vps1

Click Deploy New Instance More

Get FreeBSD box up on Vultr

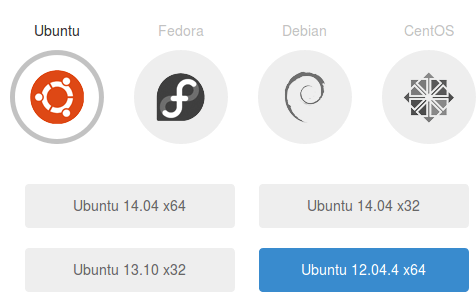
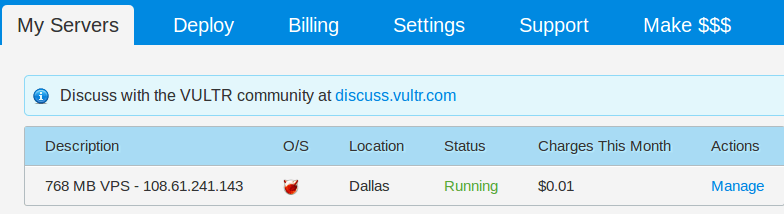
My FreeBSD box on Vultr is up and ready to work. The process is fast too and I don’t have to wait for provisioning like other provider . The closest provider I ever try is Amazon EC2. Running FreeBSD on smallest memory (if I not wrong its 384 MB). In Vultr process is fast and clean :

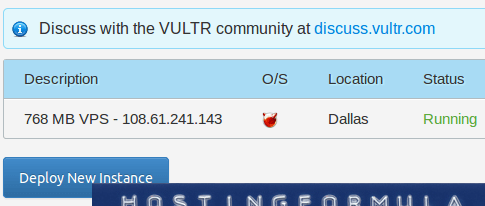
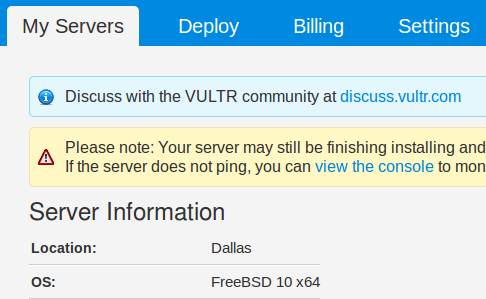
After create an instance I got this view. Click Manage.

vultr_freebsd1

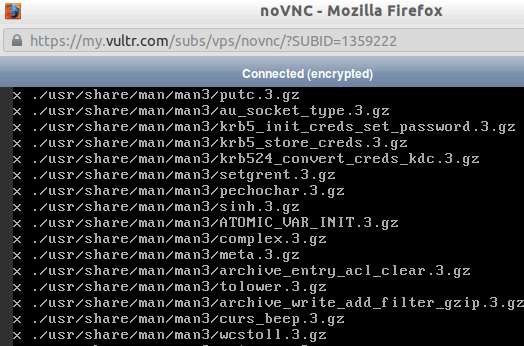
Looks like the install process use install script and you can see the process by click “view the console” link to get detailed view.

vultr_freebsd2

The process in console took around 4 minutes till I see login box .

vultr_freebsd3

I try to Ping the server

$ ping 108.61.241.143
PING 108.61.241.143 (108.61.241.143) 56(84) bytes of data.
64 bytes from 108.61.241.143: icmp_seq=1 ttl=49 time=279 ms
64 bytes from 108.61.241.143: icmp_seq=2 ttl=49 time=279 ms
64 bytes from 108.61.241.143: icmp_seq=3 ttl=49 time=297 ms
64 bytes from 108.61.241.143: icmp_seq=4 ttl=49 time=286 ms
64 bytes from 108.61.241.143: icmp_seq=5 ttl=49 time=304 ms
64 bytes from 108.61.241.143: icmp_seq=6 ttl=49 time=283 ms
64 bytes from 108.61.241.143: icmp_seq=7 ttl=49 time=302 ms
64 bytes from 108.61.241.143: icmp_seq=8 ttl=49 time=291 ms
64 bytes from 108.61.241.143: icmp_seq=9 ttl=49 time=290 ms
64 bytes from 108.61.241.143: icmp_seq=10 ttl=49 time=289 ms
64 bytes from 108.61.241.143: icmp_seq=11 ttl=49 time=279 ms
^C
— 108.61.241.143 ping statistics —
11 packets transmitted, 11 received, 0% packet loss, time 10011ms
rtt min/avg/max/mdev = 279.245/289.360/304.772/8.593 ms

Try SSH login

$ ssh [email protected]
The authenticity of host ‘108.61.241.143 (108.61.241.143)’ can’t be established.
ECDSA key fingerprint is 06:e1:93:2f:1e:cd:81:88:26:ab:c9:f4:70:d1:cc:e8.
Are you sure you want to continue connecting (yes/no)? yes
Warning: Permanently added ‘108.61.241.143’ (ECDSA) to the list of known hosts.
Password for root@freebsd-4103:
FreeBSD 10.0-RELEASE (GENERIC) #0 r260789: Thu Jan 16 22:34:59 UTC 2014

Welcome to FreeBSD!

Before seeking technical support, please use the following resources:

o  Security advisories and updated errata information for all releases are
at http://www.FreeBSD.org/releases/ – always consult the ERRATA section
for your release first as it’s updated frequently.

o  The Handbook and FAQ documents are at http://www.FreeBSD.org/ and,
along with the mailing lists, can be searched by going to
http://www.FreeBSD.org/search/.  If the doc package has been installed
(or fetched via pkg install lang-freebsd-doc, where lang is the
2-letter language code, e.g. en), they are also available formatted
in /usr/local/share/doc/freebsd.

If you still have a question or problem, please take the output of
`uname -a’, along with any relevant error messages, and email it
as a question to the [email protected] mailing list.  If you are
unfamiliar with FreeBSD’s directory layout, please refer to the hier(7)
manual page.  If you are not familiar with manual pages, type `man man’.

Edit /etc/motd to change this login announcement.

root@freebsd-4103:~ #

Excellent!

root@freebsd-4103:~ # df -H
Filesystem            Size    Used   Avail Capacity  Mounted on
/dev/label/rootfs0     14G    755M     12G     6%    /
devfs                 1.0k    1.0k      0B   100%    /dev
root@freebsd-4103:~ # uname -a
FreeBSD freebsd-4103 10.0-RELEASE FreeBSD 10.0-RELEASE #0 r260789: Thu Jan 16 22:34:59 UTC 2014     [email protected]:/usr/obj/usr/src/sys/GENERIC  amd64
root@freebsd-4103:~ # cat /etc/rc.conf
# Auto-Enabled NICs from pc-sysinstall
ifconfig_vtnet0=”inet 108.61.241.143 netmask 255.255.255.0″
defaultrouter=”108.61.241.1″
hostname=”freebsd-4103″
sshd_enable=YES
root@freebsd-4103:~ # pkg info
The package management tool is not yet installed on your system.
Do you want to fetch and install it now? [y/N]: y
Bootstrapping pkg from pkg+http://pkg.FreeBSD.org/freebsd:10:x86:64/latest, please wait…
Verifying signature with trusted certificate pkg.freebsd.org.2013102301… done
Installing pkg-1.2.7_2… done
If you are upgrading from the old package format, first run:

# pkg2ng
pkg-1.2.7_2                    Package manager
root@freebsd-4103:~ # pkg info
pkg-1.2.7_2                    Package manager
root@freebsd-4103:~ #
root@freebsd-4103:~ # top > tes
root@freebsd-4103:~ # cat tes
last pid:   809;  load averages:  0.15,  0.17,  0.12  up 0+00:19:23    14:04:30
19 processes:  2 running, 17 sleeping

Mem: 14M Active, 13M Inact, 38M Wired, 44M Buf, 659M Free
Swap: 2000M Total, 2000M Free

PID USERNAME    THR PRI NICE   SIZE    RES STATE    TIME    WCPU COMMAND
795 root          1  20    0 86084K  6932K select   0:00   0.00% sshd
722 root          1  20    0 23980K  5348K select   0:00   0.00% sendmail
775 root          1  20    0 86084K  6928K select   0:00   0.00% sshd
798 root          1  20    0 23492K  3392K RUN      0:00   0.00% csh
778 root          1  21    0 23492K  3272K ttyin    0:00   0.00% csh
560 root          1  20    0 14424K  2056K select   0:00   0.00% syslogd
729 root          1  20    0 16520K  2148K nanslp   0:00   0.00% cron
809 root          1  20    0 19768K  2532K RUN      0:00   0.00% top
694 root          1  20    0 60816K  6416K select   0:00   0.00% sshd
766 root          1  52    0 14420K  1912K ttyin    0:00   0.00% getty
770 root          1  52    0 14420K  1912K ttyin    0:00   0.00% getty
768 root          1  52    0 14420K  1912K ttyin    0:00   0.00% getty
771 root          1  52    0 14420K  1912K ttyin    0:00   0.00% getty
773 root          1  52    0 14420K  1912K ttyin    0:00   0.00% getty
767 root          1  52    0 14420K  1912K ttyin    0:00   0.00% getty
772 root          1  52    0 14420K  1912K ttyin    0:00   0.00% getty
769 root          1  52    0 14420K  1912K ttyin    0:00   0.00% getty
451 root          1  20    0 13584K  4452K select   0:00   0.00% devd

Virtualization check :

root@freebsd-4103:~ # dmesg | grep -i virtual
CPU: Vultr Virtual CPU 2 (3392.31-MHz K8-class CPU)
sc0: VGA <16 virtual consoles, flags=0x300>
root@freebsd-4103:~ #

Good job vultr 🙂


How to set name server (ns) of your web hosting to a domain

You already buy a domain but forgot how to set name server or you switch to new hosting or you just bought a complete website and need to transfer to your hosting company then you need to know how to set name server.

Name Server Format

If you bought a hosting package (shared hosting or reseller hosting) then you should get email with details. Pay attention to these section :

(example below from certifiedhosting)

NEW ACCOUNT INFO
Domain:yourdomain.com
Username: username
Password: uniquepassword
Hosting Package: GEEK
Server IP: 205.196.23.70
Nameserver 1: DNS1.ICERTIFIED.NET
Nameserver 2: DNS2.ICERTIFIED.NET

Nameserver 1 and nameserver 2 is your friend.

Login to your Domain Registrar

I use namecheap as example. The interface is clean and easy to understand.

Click on “View” link near “number of domains in your account”.

set_dns_namecheap_1

Click Domain name followed by click “Transfer DNS to a Webhost”.

set_dns_namecheap_2

Choose “Specify Custom DNS Servers” and enter value of DNS Servers.

If your web hosting package list till 4 dns servers then you must enter all servers.

Click Save Changes.

Checking DNS Change

You can use intodns.com to track the change you made.

set_dns_namecheap_3

In general any changes to name server will be affected to all internet zone take time (3 days in average, no need to worry if you can not see anything during that moment).


Switch to PHP 5.4 on BlueHost

I want to learn laravel 4 and find starter kit using github that combine many class from others plus twitter bootstrap.

As traits available on php 5.4 I decide to find a host that support that version. As  I have account on Bluehost I decide to try it. Bluehost provide php 5.2, 5.3 and 5.4. By default you’ll see php 5.2 but you can enable other version. Here’s how to do that :

1. Login to bluehost cpanel

2. Find PHP Config

The option under Software/Services

change_php1


Choose PHP 5.4 (single php.ini) and click save settings.


change_php2


3. Try login via ssh

ssh access not provided by default. You need to request it first via support.

PHP cli will follow the setting. Here’s my login before change the version :

Using username “myacc”.
[email protected]’s password:
Last login: Sun May 12 20:54:42 2013 from 36.69.54.183
[email protected] [~]# php -v
PHP 5.2.17 (cgi-fcgi) (built: Oct 29 2012 18:51:17)
Copyright (c) 1997-2010 The PHP Group
Zend Engine v2.2.0, Copyright (c) 1998-2010 Zend Technologies
with Zend Optimizer v3.3.9, Copyright (c) 1998-2009, by Zend Technologies
[email protected] [~]#

Here’s my login after change PHP version to PHP 5.4 :

Using username “myacc”.
[email protected]’s password:
Last login: Wed May 15 21:51:27 2013 from 180.242.6.211
[email protected] [~]# php -v
PHP 5.4.13 (cgi-fcgi) (built: Apr 5 2013 16:41:50)
Copyright (c) 1997-2013 The PHP Group
Zend Engine v2.4.0, Copyright (c) 1998-2013 Zend Technologies
[email protected] [~]#

As simple as 123 🙂

Step by step install WordPress Multi User : part 1

I have request to create wordpress multi site, one domain connected with other properties with blogspot, weebly etc together with other domain (.net .org and many more) .

I this post I just want to share how to create wordpress multi site that connect with other TLD.

I use these stuff :

Schema :
1. db1 for main domain -> use standard wordpress installation
2. db2 for portal address (subdomain of main domain) -> for use with main page for manage client site.
3. db3 for client site (TLD domain) and host everything.

Lets get start with installation steps for WordPress Multi User :

WordPress multi user that known as wpmu already merge into wordpress.org code so you only need latest version of wordpress from wordpress.org

1. Install standard wordpress from wordpress.org for main domain

easy as 123

2. Install wordpress for portal use subdomain of main domain.

http://portal.domainname.com

Login to cpanel and click subdomains

More

Namecheap DNS and Blogspot Custom Domain

I used to use free dns service like mydomain.com or zoneedit.com to manage specific record like A record, spf record, txt record etc. Until I try namecheap service that also provide that service for free.

To enable namecheap dns management service is simple :

1. Login to your namecheap

Choose your domain and click “Transfer dns back to Us”

2. Review current dns setting

3. Check “transfer dns to namecheap default dns” and hit save changes button.

Domain name servers updated!

The domain name servers are updated based on your request. As the options would change based on DNS server used, we have refreshed the page to show appropriate links on the left side.

4. Now you can change all Host records for that domain

For full aspect of all host records on namecheap for blogspot purpose you click this link.

Creating database and 123 reg co uk

Another common job that I do during transfer a website is creating mysql database. Each web hosting has their own system and so does 123 reg co uk. To create a database on 123 reg co uk account is simple. Foolow this guide :

1. Login to your panel

Click Manage web hosting

2. Choose your web hosting account

click Manage link

3. Click “Manage database”

4. Click “add database”

123 reg co uk system will automatically all data and you can write down it and edit your wp-config.php (if you use wordpress) with that data.

5. Manage your database

123 reg co uk also use phpmyadmin that you can access by click icon under “login” column.

See you and stay health!

Addon Domain and 123 reg co uk

A client contact me to move his website that use wordpress engine to new web hosting which use service from 123 reg co uk. Their system (123 reg co uk) is bit different that I ever seen so I decide to share my experience.

How to add new domain as addon domain on 123 reg co uk :

1. Login to their panel

Choose Manage web hosting

2. Choose which hosting account you have (in case you have a few account) by click ‘Manage’ link.

3. Click Domain Mapping

4. Click link that provide access to add an domain.

5. If you already have domain you can use ” point a domain registered elsewhere to 123-reg” and enter domain name.

Hit Check button.

6. System should add your domain, if you see this message :

“this domain has been registered”

That domain already exist on system. You can contact support to check it for you. In my experience that message happened when seller sell their website but not push the domain ownership to buyer.

When the domain transfer work well you will not see that message again.


How to upgrade fresh store builder

New amazon changes on their API policy since October 25 2011 already rolled out and as Fresh Store Builder (FSB) user I’m waiting for their respond about this change. I’m wrong and I must confess that I’m little late than FSB developer team. New version already launch on 20th October 2011 with API anticipated plus others enhancement.

I start using FSB since version 2.3.0 and have no experience on how upgrade process work. This post is my documented process around FSB upgrade. Lets get start!

The only requirement before do this procedure is : Backup your files and database first.

Download latest FSB version

Login to FSB and download latest version.

More

How to add new domain on Hostgator Shared Host

A client want to add new domain on his Hostgator account, he want to host another blog for his wife and ask me to do that. This job is easy but I’m aware if others not familiar with the process will think different.

I just want to share on how to add other domain on your Hostgator account

Requirement for this work :

1. Account that support more than one domain (choose unlimited domains)

2. Active domain (expire domain will be useless)

Lets get start!

Login to Hostgator account via cpanel, you can use this pattern :

http://yourdomain.extension/cpanel

Enter username and password.

Scroll down to Domains section and click “Addon Domains” icon.

More

A few notes around Godaddy Hosting

I never work with Godaddy Hosting before until  a client ask me to transfer wordpress blog that sold through flippa to Godaddy Hosting.

Little bit confusing for moment since you must click a few link to get hosting panel and I create this post for my future work 🙂

Access Godaddy Web Hosting

Login to your godaddy account and click My Account.

Click Web Hosting link under Hosting Management .

Existing web hosting located under Plan column.

To access it click Launch button.

More

Step by step guide adding rel=author for your wordpress blog

My friend ask me about rel=author in practice. I promise to make a post and share my experience with wordpress blog. Hosting Formula is using wordpress and I use it for practice.

Requirement 

To get this process work well you’ll need Google + account.

Install rel=author wordpress plugin

I use easy rel=author plugin and add it like other wordpress plugin. You must upload it from add plugin menu since no official wordpress plugin available.

After activate this plugin you must do these steps :

1. Click ‘Your Profile’  link under Users menu.

2. Enter your ‘Google + URL’ and click ‘Update Profile’ button.

Google + URL is in format :

https://plus.google.com/xxxxxxxxx

where xxxxxxx is your number.

Activate Easy rel=author option

1. Click Easy rel=author link from Settings menu.

2. Choose between ‘Add a footer on each post’ and ‘Use author name in footer link’  and click  ‘save settings’ button. I prefer to use footer link but if your template not support it you can use footer on each post.

Edit Google + profile for add Link

1. Open Google +

2. Find ‘Edit Profile’  and click the button.

3. Click Recommended Link

4. Click ‘Add Custom Link’

5. Enter your URL and anchor.

6. Save it

Testing your configuration

1. Open Google webmaster richsnipplets page

2. Enter one post from your wordpress blog, eg: http://www.mydomain.com/post_title and hit ‘Preview’ button.

3. Pay attention on  ‘Extracted Author for this page’ information.

If you see this message ‘Verified: Authorship markup is correct for this page’ then you’re in good track.

P.S : if you have multi author on your wordpress blog then you need to enter their Google + profile link one by one.

See you on other post and stay health!


Step by step Install Fresh Store Builder on Localhost

Other series of Fresh Store Builder :

Today I found an online store that looks great and I found its engine called FSB (Fresh Store Builder). Being curious with so many positive testimonial  I’ve conduct a research on it and I like it . That’s why I continue with purchase the license 🙂

After purchase the license I want to continue with installation process but I prefer to do it with localhost way on my Acer Netbook that run Windows 7 starter.

Lets get start!

Preparation

1. Download latest version of FSB from my account.

Step by step Install Fresh Store Builder on Localhost : download latest version of FSB

Save to my document or other folder.

More

How do I know if my web hosting company support php, apache etc

How do I know if my web hosting support my business? Are they support PHP, Apache, Mysql or Linux as requested by my programmer or web designer to make sure my online business run well.

Hmm, I try to answer it using tools and my existing cpanel web hosting account.

1. Apache, PHP, Mysql version

If you run PHP based script you need these trio (Apache, PHP and MySQL)

Login to cpanel

See at the left side of your cpanel

As you see from the picture, my web hosting use :

– Apache web server version : 2.0.63

– PHP version : 5.2.17

More